This week’s post is by Manuel Perez, a web developer working in our web division at IT Impact, Inc. Manuel has been experimenting with Amazon’s EC2 cloud service and I asked him to document how to get started on the service, and pave the way for our readers to start experimenting with their own cloud servers.
As you may already know, our firm specializes in creating Access apps where all of the data is stored in the cloud. It’s a great combination that’s robust and quick, but not necessarily easy to configure or optimize.
What you may not know is that we also have a web division that creates pure web apps using .NET, Silverlight and even PHP. Which technology we use will depend on the application design and the preferences and needs of our clients. As part of our continuing efforts to leverage the latest technology, I’ve been setting up virtual servers using Amazon’s free EC2 tier and I wanted to document the process to help others get started successfully with the wonderful offering from Amazon.
What is Amazon’s EC2 Free Tier? (http://aws.amazon.com/free/)
You can create a micro instance of a server in the cloud. This is a great way to do experiments, setting up labs, or even to host small applications for clients. Amazon allows you to run the first instance free for as long as you need with 24/7 availability and will charge for 2nd instance and so on.. You can pick either Linux with MySQL server or Windows Server with SQL Server with up to 20 GB of space. Many of you will instantly recognize that is WAY more than what typical Access databases will ever need, making it a great test bed or even a permanent solution for a single application.
Steps to get started
- Signup for a free account here
- Click on the EC2 link in your control panel:
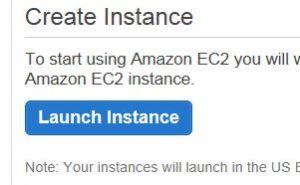
- Click on the launch instance button:
- Pick the Classic Wizard and select continue
- On the next screen you can pick either Linux or a preconfigured Windows Server 2008R2 with SQL Server Express and IIS and 35 GB of hard drive space.
- On the next screen you can choose the region and click Continue
- Note that the Advanced Instance Options are available in this screen. No change is needed so you can click Continue
- On the next screen you can add more storage to your server if you wish or hit Continue
- Add tags such as “App Server Test 1” and hit continue
- You will need to create Key Pairs in the next screen. Please download and put them in safe place to prevent unauthorized access.
- Create a security group on the next screen or just pick the default
- You are ready to launch your instance!
Assign a Public IP Address
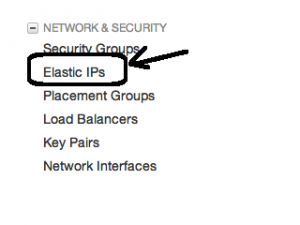
If you want the world to beat a path to your machine you’re going to need a public IP address. To configure, click on “Elastic IPs” on the left side of the screen:
Click on Allocate IP address and you are done.
Add another user to the account
We are using Juan’s account to provision machines, but getting me on as another admin was not easy, here are the steps:
Click on the IAM icon at your console home:
Click on Users on the left menu.
If needed, create an Admin group with permissions to your console.
Now that you’ve created the account you will need to supply a password so that the user can login to the console, to do so, click on the user and at the bottom of the screen select security credentials tab and proceed to assign a password.
Amazon Web Beanstalk
Another alternative to using a web server is to have Amazon host your .NET or PHP app for you, it’s called Elastic Beanstalk and we are using it for a new startup idea coming soon. I hope to write about this service soon in a future post.


I’m lost. I gave this a try and I think I created something (I think). Not sure how to get at and use what I created. Tried going through the help but that got me even more confused.
How do we know if we’ll be charged, and how much? Are we warned when we start incurring charges? Or do the facilities you mention not incur charges?
amazon rds service
how to setup a sql database in aws ec2? windows base.
thanks
“What you may not know is that we also have a web division that creates pure web apps using .NET, Silverlight and even PHP”
Can you briefly discuss the advantages and disadvantages of these technologies please? I thought you prefer Access and Sql Server, so when are these alternatives better?
Thanks